


Use Adobe’s supplied web-project embed code and check the current license for the selected fonts. Client websites need the client’s own Creative Cloud subscription. Embedding CSS correctly does not by itself establish compliance with every licensing condition.
Disclaimer
Webfont licensing and account ownership
See Adobe’s current webfont licensing documentation before configuring a client project.
Limitation
Wix HTML embed elements run inside an iframe. Fonts loaded inside the embed affect its content, not the surrounding Wix text elements. Adding a stylesheet to the main page also does not automatically style the separate iframe.
Step-by-Step Integration Process
1. Creating a Web Project on Adobe Fonts
Begin by visiting Adobe Fonts and selecting fonts for your website. Create a "web project" and take note of your project ID, which will be crucial for embedding the fonts into your site.
2. Embedding the Adobe Fonts CSS in Wix
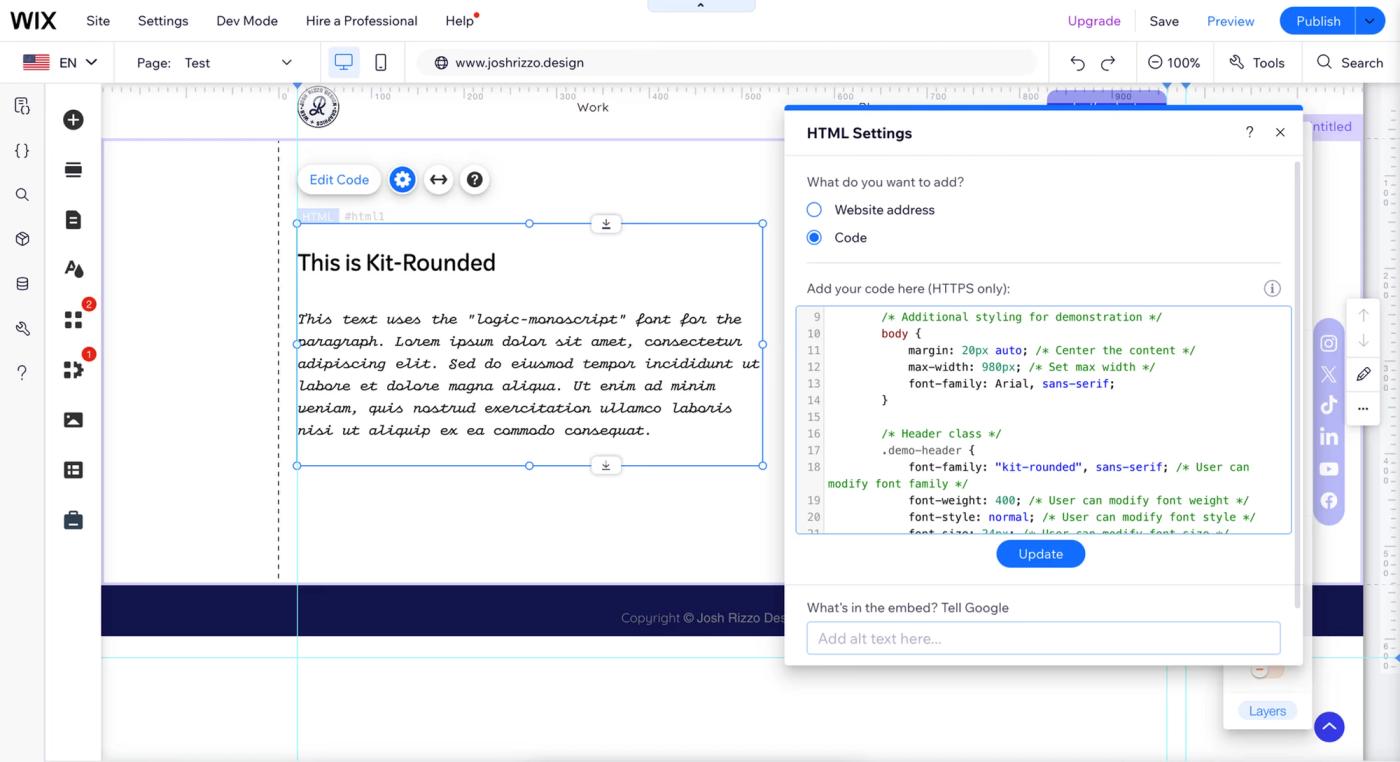
For an HTML embed, include Adobe’s web-project stylesheet inside that embed’s HTML head. Replace the project ID below with the ID supplied by your Adobe web project. A separate site-wide custom-code installation is not needed for this iframe-only example:
<link rel="stylesheet" href="https://use.typekit.net/[yourprojectID].css">
For more detailed instructions on creating and managing your web project on Adobe Fonts, visit their official guide.
3. Utilizing the HTML Block for Text Elements
Now, integrate the custom font into your site using the HTML block provided. Ensure to replace [YourProjectID] with your project ID. Customize the font family, size, weight, and style within this HTML to match your site's design:
<html>
<head>
<title>Adobe Fonts Integration</title>
<style>
@import url("https://use.typekit.net/[YourProjectID].css");
body {
margin: 20px auto;
max-width: 980px;
font-family: Arial, sans-serif;
}
.demo-header {
font-family: "kit-rounded", sans-serif;
font-weight: 400;
font-style: normal;
font-size: 24px;
margin-bottom: 10px;
}
.demo-paragraph {
font-family: 'logic-monoscript', monospace;
font-size: 16px;
line-height: 1.5;
overflow: hidden;
margin-bottom: 20px;
}
</style>
</head>
<body>
<h1 class="demo-header">
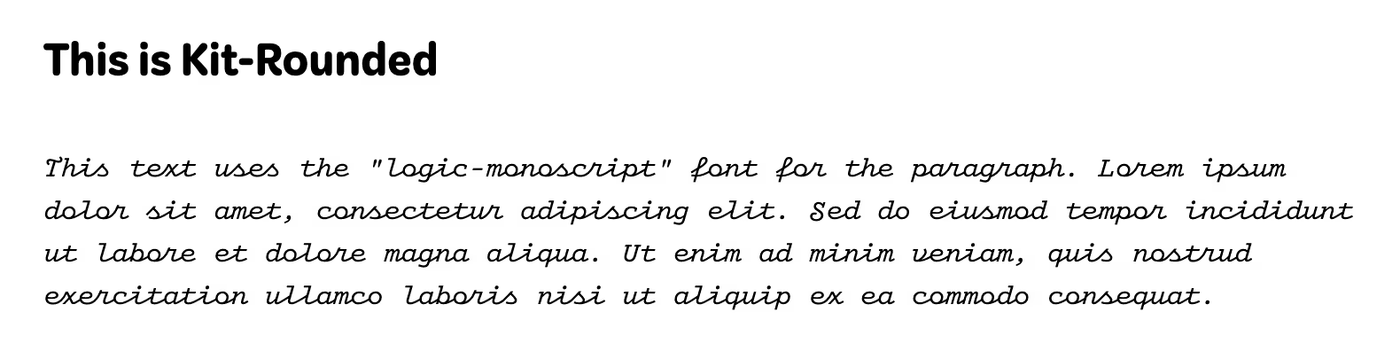
This is Kit-Rounded
</h1>
<p class="demo-paragraph">
This text uses the "logic-monoscript" font for the paragraph. Lorem ipsum dolor sit amet, consectetur adipiscing elit.
</p>
</body>
</html>
Embed this HTML block into an HTML element on your Wix site wherever you'd like the Adobe font to appear.
Here is what the live HTML embed looks like in a blog:
Here is what a practical application of this embed looks like:
Customization and Styling Tips
Experiment with different fonts and styling within the HTML block to best match your site's design. Adjust the font size, weight, and style to improve readability and aesthetics. Adobe Fonts offers a variety of fonts that can suit any mood or brand identity, making it easy to find the perfect match for your site.
Maintenance and Updating
Changes to the Adobe web project affect the fonts it serves. Check that each embed still requests a font family, weight, and style included in the project. Test the embed at mobile and desktop sizes after changing its typography.
Conclusion
Integrating Adobe Fonts into your Wix site can significantly enhance your website's design and user experience. While the process requires attention to detail, the result is a visually cohesive and engaging site.
If you're interested in streamlining this process or if you have ideas for an app that delivers Adobe Fonts more efficiently on Wix sites, I'm looking for collaborators. Whether you're a developer, a designer, or simply have an interest in web typography, I'd love to hear from you.